Last time, I wrote about how to set up a basic maintenance plan to back up your databases on a regular basis to avoid having your transaction logs grow out of control and fill up your disk. As I mentioned at the end of that article, that routine creates backup files, but it does not delete them, so you could still end up running out of disk space. Today, I’ll show you how to modify the maintenance plan we made to take care of this.
I’m going to repeat the same disclaimer I gave last time: This tutorial is intended for accidental DBAs – people whose primary job role is something else, but ended up in charge of one or more SQL Servers. It will create a very basic backup plan that will prevent transaction logs from growing to eat up all your disk space and give you a basic level of data protection. It is not meant as a substitute for someone with database experience who can actively manage your environment.
Before we get into modifying the maintenance plan however, I want to give a brief overview of how SQL Server backups work. The maintenance plan we defined creates a full backup each Sunday, differential backups Monday through Saturday, and transaction log backups hourly. In order to determine what backup files we can delete, we need to understand what files SQL Server needs in order to restore a backup. Take a look at this calendar:
Supposed today is the 30th and we need to restore the backup that was taken at midnight on the 27th. The 27th was a Friday, so the backup taken that morning was a differential backup. In order to restore that, we need the full backup it was based on, namely the full backup taken on the 22nd. (Note SQL Server uses differential backups, not incremental backups. Therefore, in this scenario, we don’t need to restore the backups taken on the mornings of the 23rd through 26th. Each differential backup contains all the changes made to the database since the last full backup was made.)
Now we can figure out what backup files we need to retain and for how long. I’m going to assume our business requirements are that we need to be able to restore the databases to any day within the past four weeks. Additionally, we need to be able to restore the databases to the point of failure during the current day. In other words, our databases are used during the day – perhaps they are online transactional databases for taking product orders. At the end of each day, the orders are finalized and we no longer care about recovering to a point in time for that day. For instance, if today is the 27th, we will never need to restore to the 24th at 5:23 PM. We only would need to restore to either the 24th at midnight or the 25th at midnight. We may need to restore to the 27th at 9:12 AM however.
Given this, we can conclude that we need to retain 4 week’s worth of full and differential backups and 1 day’s worth of transaction log backups. So, how do we modify our maintenance plan to do this? Easy.
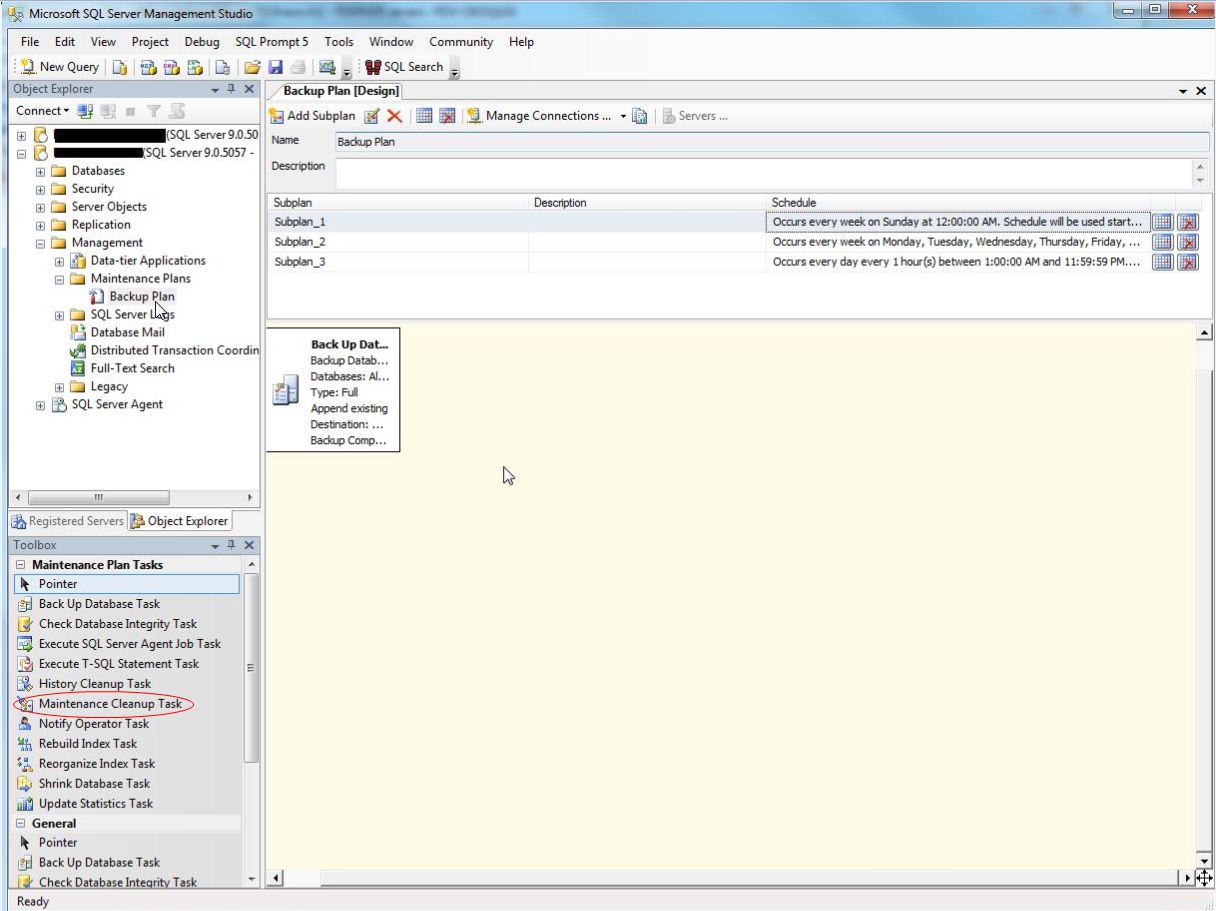
First, in SSMS, connect to your SQL Server and expand the Management node. expand the Maintenance Plans node and you should see your maintenance plan. Right click it and choose Modify. (Click any screenshot to embiggen.)
This will open up the plan for editing inside SSMS. Across the top of the pane, you will see a list of your subplans. Recall that when we initially made this plan, the first subplan was for full backups, the second was for differential backups, and the last was for transaction log backups. We will be adding a Maintenance Cleanup Task to each of those subplans. First, let’s change Subplan_1. When you first open the plan, you will probably see something like this:
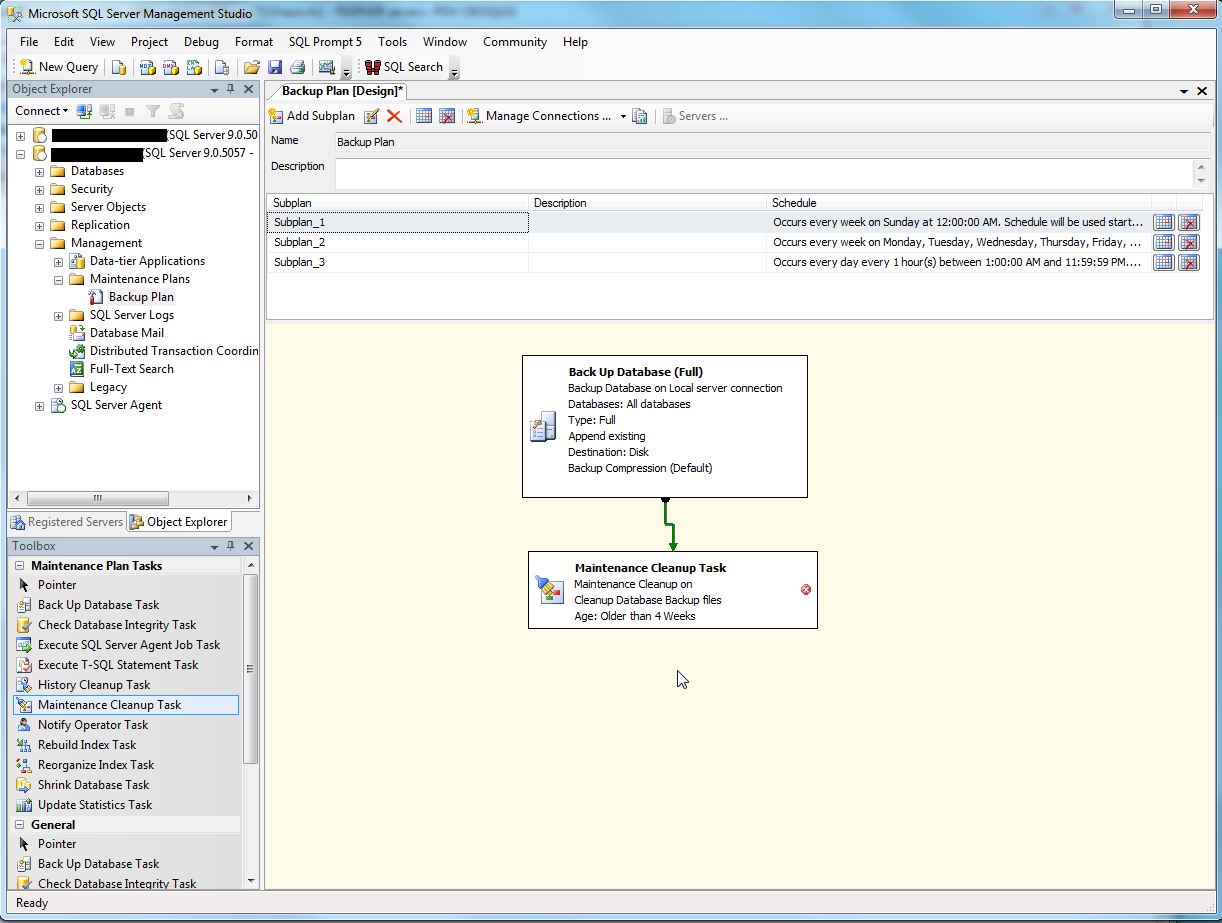
You can move the existing task and enlarge it so you can see all the text. Drag the Maintenance Cleanup Task from the tollbox on the left into the main pane. Click on the Back Up Database (Full) task to select it. You will see an arrow appear at the bottom of the box. Drag the head of the arrow down to the new Maintenance Cleanup Task you just created. You should see something similar to this:
The green arrow tells SQL Server to continue to the Maintenance Cleanup Task if the Backup task successfully completes. (You can set up other tasks for cases of failure, but that is outside the scope of this tutorial.) Now, right click on the Maintenance Cleanup Task and choose Edit… You will be presented with the following screen:
Notice the items I circled in red. The path in the Folder field should be the path you are storing your backups in. The BAK extension is the default for SQL Server backup files. We need to check the Include first-level subfolders box because when we made the maintenance plan, we told the wizard to create a separate subfolder for each database. This check box tells SQL to recurse the folders one level deep when looking for files to delete. The option to delete files older than 4 weeks is the default setting and we don’t need to change it. Click OK to accept these settings.
We’ve now made changes to the full backup portion of the maintenance plan to delete old backup files. The next step is to do the same thing for the differential backups files. At the top of the editing pane, click the Subplan_2 line to switch to editing that subplan. I’m going to make one change here to make the file maintenance process a bit easier. Once again, move and resize the backup Database (Differential) task so you can read it. Right click the task and choose Edit… You’ll see the following screen:
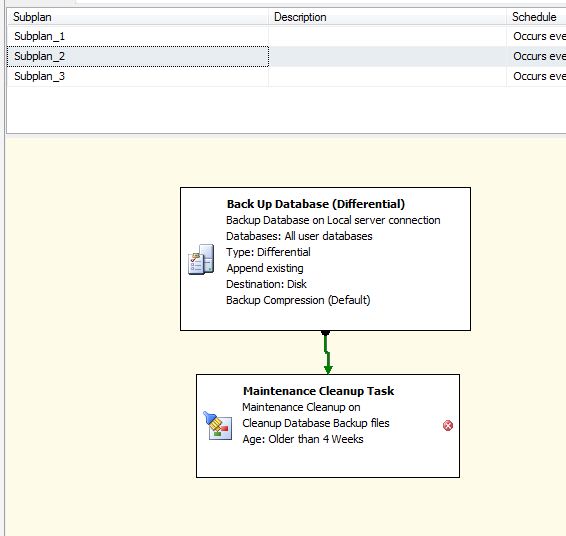
Change the backup file extension field from the default of BAK to DIF. I’m doing this simply to make it easier to differentiate between the full and differential backup files because SQL Server uses the same extension for both by default. Click the OK button to accept this change. As we did previously, drag the Maintenance Cleanup Task from the toolbox to the editing pane and connect the arrow from the backup task to it:
Now, right click the Cleanup task and choose Edit… As we did before, we’re going to specify the path where the backup files are located, the file extension (which we changed to dif), and tell SQL to recurse one level of subfolders. We can again accept the Delete files older than 4 weeks default.
Click OK to accept the changes. This completes our work on the differential backup subplan.
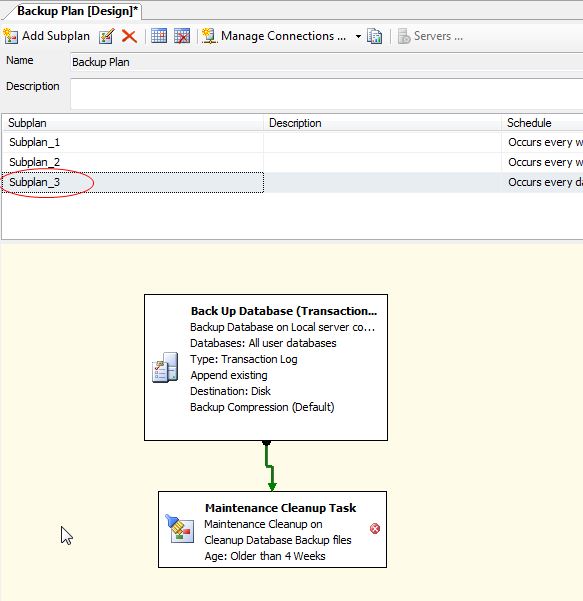
Click on Subplan_3 at the top of the editing pane to select the transaction log backup subplan, move and resize the backup task, drag out a new maintenance cleanup task, and connect it by arrow to the backup task.
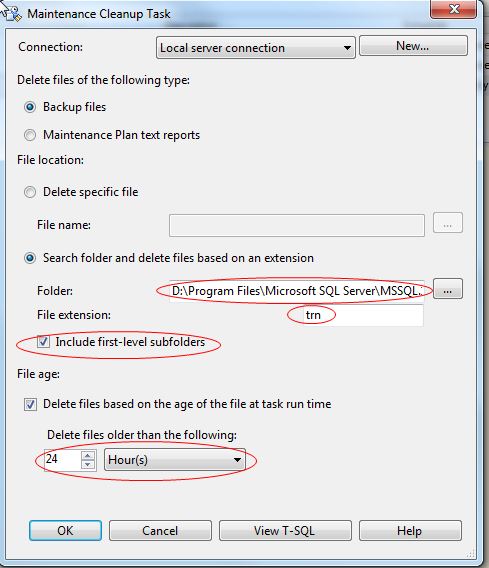
Right click the Maintenance Cleanup Task and choose Edit.. Make the following changes:
Note here we have to change the Delete Files Older Than setting from the default of 4 weeks to 24 hours. This is because our business needs say we only need to recover to a point in time for the current day. Click OK to accept.
We have now set up automatic deletion of our old backup files. If we had to, we could stop here. However, there are still two more things we need to manage – one is the text files the maintenance plan generates. We don’t need those hanging around forever. The second is something the accidental DBA might not know about. SQL Server stores records of each backup it takes, history of each job that executes, and history of each time the maintenance plan runs. If you don’t actively manage these, your MSDB database will grow. (That database contains the system tables where this information is stored.)
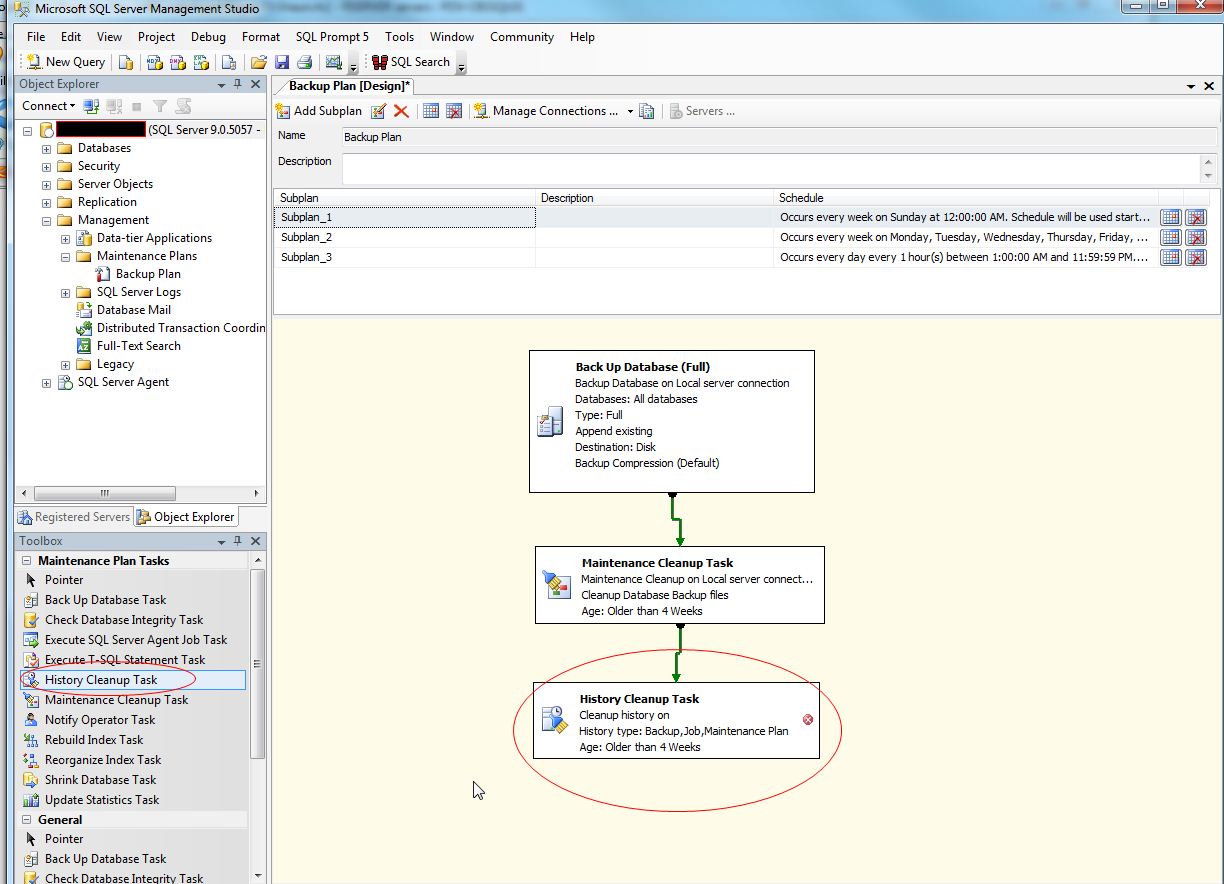
Let’s tackle the second one first. Switch back to the first subplan by clicking Subplan_1 at the top of the edit pane. Drag the History Cleanup Task from the toolbox into the editing pane and connect it to the Maintenance Cleanup Task.
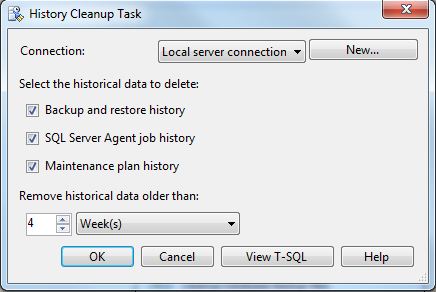
Right click the History Cleanup Task and choose Edit… To bring up the following screen:
The options shown are all defaults and can be kept. Click OK to accept.
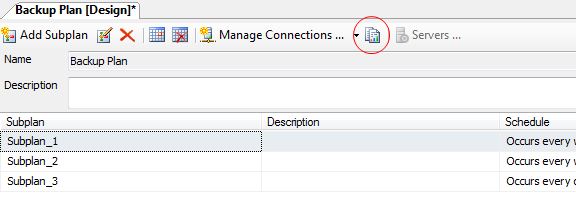
The final thing we need to do is to manage the text files the maintenance plan creates. First, we need to find out where the directory where the files are being written. Do this by clicking the Reporting and Logging button in the tool bar:
This will open up the window shown below. Make a note of the path specified as we will need it later.
Click Cancel to close the window without saving any changes. Now, drag a new Maintenance Cleanup Task into Subplan_1 and connect it with an arrow as shown:
Edit this task. This time, select the Maintenance Plan text reports radio button. Paste the path you found in the previous step into the Folder box:
Click OK to save the task. That completes our edits! Save the new plan by clicking the Disk icon.
If your backup policies require you to maintain backups for a different length of time than we set up here, it should be relatively straightforward to modify the times in this example to suit your needs. The important thing to watch out for is that you always have the last full backup needed to restore a differential backup.
You can also make the plan easier to read by changing the names of the tasks (the text in bold). You can do this by single clicking the task to select it, then single clicking the bolded text to change it.


